Tuesday, December 29, 2009

Papier-Mache Bead Bling


Just a little something I've been working on through the holidays. Kinda funky, but it's my first try at jewelry and I'm not gonna be too tough on myself. This is a craft many people have gone very far with, in fact, the craft dates back to China in the beginning of the 2nd century A.D with the invention of paper itself. A couple hundred years later it was brought to the Persians thanks to some Chinese prisoners who taught the craft to the locals. Then the Europeans caught on. Word has it, french peasants would buy paper waste from bookbinders and publishers and process it by chewing it. Hence the name papier mache meaning "chewed-up paper". There are so many examples of great papier mache in all its forms.  I just found artist Nancy Winn through google....and she makes some incredible animal art out of recycled materials.

http://www.nancywinnsundawg.com/

But, enough of those accomplished artists. :-) Back to me.


After all that paper, I just had to get my hands on some wool. So, I used some of those beads I made a few weeks ago and turned them into a bracelet.


When it comes to wool, I just can't help myself. I'd have to say my favorite texture was the felt, but the colors of the papier mache were so vibrant. And, you don't actually need to chew the paper to make it (I thought about not including that note in this post, but my conscience got the better of me). Just take some paper (printer paper, newspaper, etc....avoid construction paper though, it doesn't break down well) and boil it all while stirring until it starts to break down. Drain the water. Add some Elmers glue until it makes a nice paste. Then, go crazy!!!! You can free hand it or you could sculpt over a frame. Make a mask. Make jewelry. Make Animals. Most importantly, Make Memories. Just thought I'd toss a little extra sappy in there. Don't forget to let it dry all the way through (could be a few days depending on size), and then decorate it!! I sprayed my beads with a clear enamel to make them last. The question is.... do I really want them to?? I'm thinking I do. They are just about as close to "bling" as I can get. I'm sad to say, I had to google "bling" to make sure I was using the term correctly. We don't hear much of that fancified city-talk out here in the back woods.

Sunday, December 20, 2009

O' Christmas Tree


Resist Christmas Tree

Ha. That title cracks me up. The actual technique I was using to make the Christmas Tree design was a "resist" but when it's written the way it is above it sounds like the internal monologue of a Terminator hell-bent on having a bad time during the holidays. 

I digress. This tree is so easy to do. All you need is
  • masking tape
  • watercolor paint
  • paper
 You start by getting some small pieces of tape and place them on the paper, feathering them down from what you would imagine would be the center of your tree. It looks something like an arrow tip.

Remember that where you place the tape will be where the paint cannot reach....the paper with tape on it "resists" the paint. So, it will be white under the tape. It took my brain a bit of time to grapple this concept for some reason (I am going to point the finger at motherhood). Once you've laid all the tape, it's time to paint. Pick your color and go for it!! You definitely want to fill in all the gaps on the inside of the tree and you can go around some of the edges on the outer tape....but not all, because you'll want it to have that realistic look of a snow-laden bough. Let the paint dry, and when it is finished you can slowly peel the tape back and look at the little winter wonderland you've created. You could also consider flattening the entire picture, once fully dry, with a book to get a neater appearance.There are so many great things you can do with this resist technique....one twist on the Christmas tree would be to use green paper and white acrylic paint and do the reverse. Either way, it is sure to add some more charm to your homes during the holiday season. This is a great craft for kids too....it's like magic to them when the tape is peeled away. :-)


Monday, December 14, 2009

And, for my first post: Traditional Felting


     Felting wool is something I've been messing with for quite some time, whether planned or by mistake (many a sweater has been reduced down a couple of sizes under my watch). Recently, I've explored the idea of felt balls for baby toys, ornaments, or even as a type of jewelry. So, for my very first post I thought it would be good to start with something with which I am familiar (and it is so very *easy* to learn).
In the beginning there was:
     Then someone gave her a haircut. It wasn't me. Someone put all that fleece into a bag and sold it at the Common Ground Fair. I bought it. You see, I was silly and didn't realize that there was some very stinky work ahead of me to make this fleece into something of use.   After a bit of research and a lot of internal complaining, I started the process of cleaning the fleece of one dirty sheep. The whole thing goes something like this  
  1. "Skirting" it, which is when you lay out the fleece and try to get out all the vegetable matter and *poop* that you can see. You can use scissors to trim the extra yucky pieces off.
  2. Then, wash it very delicately (you don't want it to felt just yet) by letting it sit in warm water, then cool water and continue the cool rinses until the water draining from the wool didn't smell like stinky sheep. 
  3. I had to air dry it for couple of days on a screen of sorts to let the air circulate. 
  4. "Carding" was next. I found some dog brushes at the grocery store and bought two. Carding is a way to line up and straighten  the fibers. It also gets any leftover matter out of the fleece. There are some pretty fancy machines out there for carding....because I was only planning on felting this fleece, I chose the cheap route and went with the brushes. 
  5. Dyeing the wool was next on my agenda. I actually used cool aide packages (and all the variety of color they have) to color the fleece. I just put them in a ziplock with some vinegar and water and the cool aide and let them sit in the sunlight for a couple of days. Then, I rinsed them in cool water (absolutely no agitating!!). I dried them again. And, finally I was done. Good gawd. 
     Then the fun begins!! Here is a little tutorial on  

How To Make Felt Balls: 
  • Wool Roving
  • Old nylon stocking
  • dish soap
  • hot water
  • big bowl 
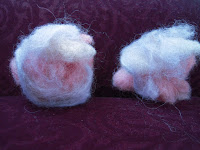
     You start with a bit of roving, any amount and mixture of colors that you like. I was working with a couple of different sizes as I was going to try making some different things. 
     You can use the nylon stocking to contain the larger pieces and to keep them in the ball shape. I didn't end up using it throughout the whole process because the pieces were small enough that I manipulated them with my hands.
     Soak the balls of roving in the hot water and soap and start squeezing gently to get them into the form you'd like them to be. Once they start firming a bit you can roll them in your palms (like you would playdough) to make the final shape. Manipulate them as much as you would like, the longer you do it the tighter the felt. 
 
     This is a great craft for kids, too. I know my daughter loved working with all the different textures....and really, what child doesn't love playing in bubbles?? There are so many possibilities for this craft: ornaments, jewelry, doll making, paper weights (just felt it around a rock), or even a soap gift (felt the wool roving around a bar of soap). I could go on and on. And, I will....in my own head....as I try to come up with some other options for this versatile fiber.